
Dot Peen vs Scribe Marking: Selector for Deep, Quiet and Permanent Marks
Industrial selector page
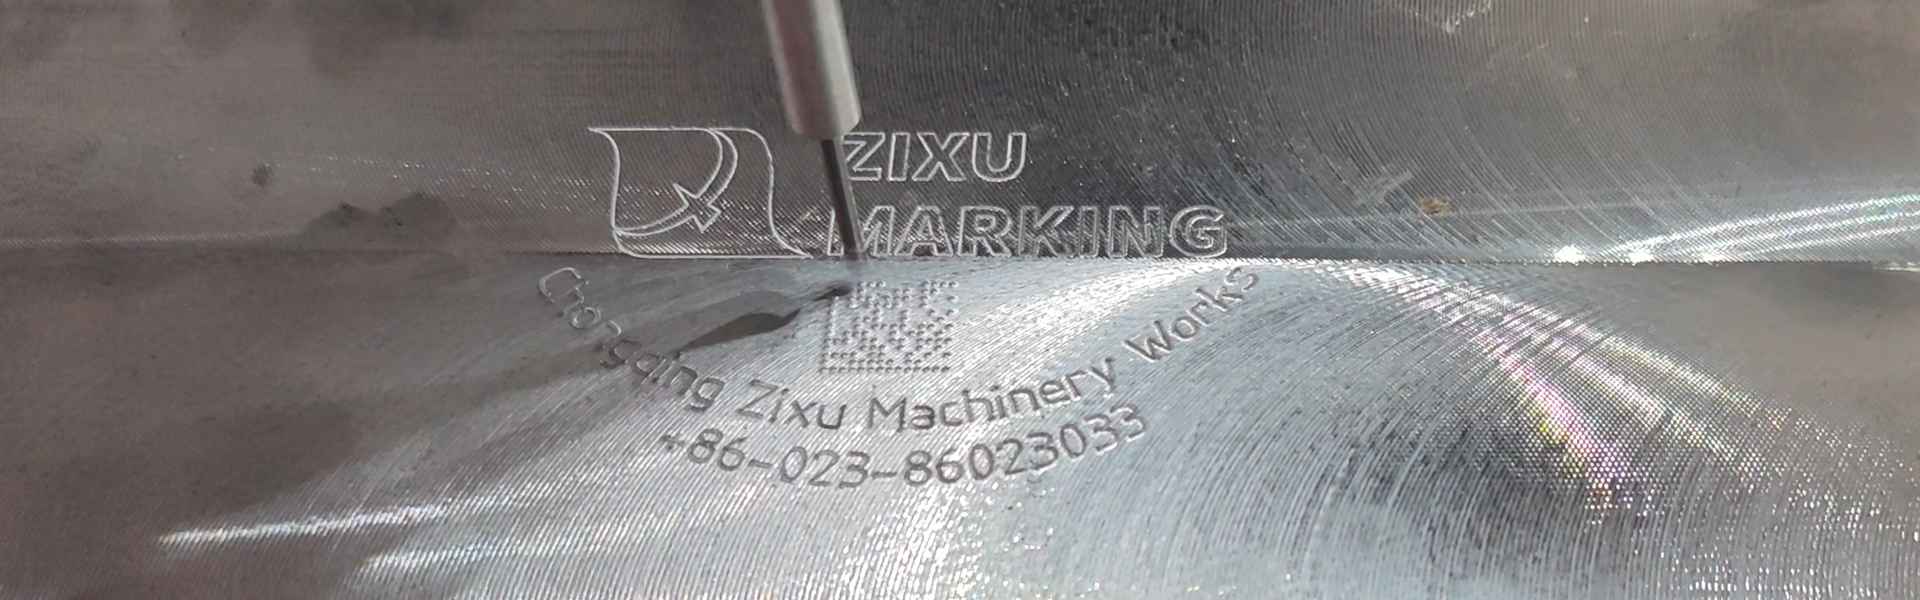
Dot peen and scribe marking are often evaluated side by side because both produce permanent mechanical marks without a laser heat-affected zone. Yet they do not solve the same production problem in the same way. Dot peen builds characters through controlled impacts and is usually selected when the buyer needs durable indentation, flexible serial content and broad part coverage. Scribe marking drags a carbide point through the surface to create a continuous line, which can reduce noise, improve visual neatness and lower the visible surface disturbance on selected parts. A buyer who compares them only at the machine-catalog level usually misses the real decision variables: material family, code style, acceptable surface deformation, takt, maintenance routine and the downstream inspection rule.
This page is written for industrial B2B buyers who need a practical selector rather than a slogan. It covers applicable materials, depth and contrast tradeoffs, thermal effect boundaries, workflow steps, quality checks, maintenance, downtime, cost inputs and safe shutdown logic. It does not invent universal pressure, force, speed or depth claims. Those values must be confirmed with sample testing on the real part family.
- Does the part need deeper mechanical indentation or a smoother, quieter continuous-line mark?
- Will the mark be read visually, scanned, coated over, blasted, painted, or handled aggressively after production?
- How much surface disturbance, burr risk or cosmetic change can the part accept?
- Does the line need flexible serial content on mixed part families, or repeat marks on a tightly controlled fixture?
- Which downtime, maintenance and operator-safety limits belong in the buying decision before the machine is approved?
1. Dot Peen vs Scribe Marking at a Glance
The core decision is not which machine is more advanced. It is which process creates the right permanent mark with the least production friction on your actual parts. Both methods are cold mechanical processes, so the thermal input is effectively negligible compared with laser marking. The real comparison is the mark geometry, how the force is delivered, how the part reacts, and what the inspection team accepts after production.
| Decision area | Dot peen marking | Scribe marking |
|---|---|---|
| How the mark is formed | Rapid impacts form dots and connected characters through controlled indentation. | A stylus drags a continuous line through the surface to create readable characters with less point-by-point impact. |
| Applicable materials | Common on steel, stainless, aluminum, coated metals and many industrial parts where visible indentation is acceptable. | Useful on metals where a smoother, quieter mark is preferred and the part can accept a drawn line rather than a dotted pattern. |
| Thermal input | No meaningful heat-affected zone in normal operation. | No meaningful heat-affected zone in normal operation. |
| Depth and visible impact | Often chosen when the buyer wants stronger visible indentation or deeper mechanical permanence. | Usually chosen when the buyer wants a cleaner line and lower visible impact while staying in a mechanical process family. |
| Noise and operator environment | Typically louder because of repeated impacts. | Often quieter because the process uses continuous movement rather than repeated impact points. |
| Takt and content flexibility | Strong option for mixed serial content, variable character strings and production traceability workflows. | Good fit when the line values neat continuous characters and can control the mark path consistently on the fixture. |
| Maintenance focus | Watch stylus wear, impact consistency, fixture drift and air or drive stability. | Watch stylus wear, line quality, drag resistance, fixture stability and motion smoothness. |
2. Applicable Materials, Surface Condition and Part Fit
Material fit should be defined before the buying team debates speed or price. Dot peen and scribe can both work across common industrial metals, but the preferred method changes with hardness, finish, thickness, cosmetic sensitivity and the allowable mark location. Thick steel parts, forgings, housings, brackets, engine components, chassis members, nameplates and valve or flange families often tolerate mechanical marking well. Thin sections, decorative surfaces or parts that cannot accept a visible indentation may narrow the safe process window or require a laser comparison.
- Document the real substrate family: carbon steel, stainless, aluminum, brass, coated steel or mixed materials.
- Record the allowable mark zone and whether the mark sits on a flat face, radius, boss, edge or curved surface.
- Clarify whether the mark must survive painting, galvanizing, blasting, heat treatment, transport abrasion or outdoor handling.
- State whether the acceptance rule is visual readability, scanner readability, or both.
- Identify any parts where the buyer values a quieter process, smoother line appearance or lower visible surface distortion.
This is also where the difference between dot peen and scribe becomes practical. Dot peen is often easier to justify when the buyer wants robust serial traceability on heavier industrial parts and accepts a dotted indentation. Scribe becomes more attractive when the part family values a continuous line, lower noise and a cleaner mark appearance but still wants a mechanical permanent-mark route.

3. Parameter Boundaries: Depth, Contrast, Mark Shape and Thermal Effect
Industrial buyers often ask which machine is deeper, clearer or faster, but those answers are only useful inside a defined sample boundary. For a real selector, the team should define what the mark must do after production and then test the process on the real part. The comparison should focus on depth tolerance, contrast or readability, local deformation, character geometry and whether the part needs a dotted code or a continuous line. Thermal effect is usually not the deciding factor between dot peen and scribe because both are mechanical processes with no meaningful heat-affected zone in the normal comparison case.
| Boundary to define | What the buyer should ask | Why it changes the process decision |
|---|---|---|
| Depth requirement | How much mechanical permanence is needed after coating, abrasion or field use? | Higher permanence pressure often favors a stronger indentation strategy, but the part must still tolerate the surface effect. |
| Visual contrast or readability | Does the mark need immediate operator readability, scanner readability, or both? | A readable mark is not only a depth question. Character spacing, line shape, finish and later coating steps all matter. |
| Mark geometry | Is the customer expecting dotted characters, continuous lines, logos, serials or a machine-readable code? | The shape requirement often separates a good dot peen choice from a good scribe choice more clearly than brochure power claims. |
| Surface sensitivity | Can the part accept visible indentation, local displacement or cosmetic change around the mark zone? | If the answer is no or only slightly, the process window narrows and the line should compare scribe or even laser instead of forcing a deep dot-peen result. |
| Thermal sensitivity | Is a heat-affected zone prohibited by the part or customer standard? | That condition usually keeps dot peen and scribe in scope and may move laser into a special-review path instead of the default choice. |
4. Practical Workflow From Setup to Safe Stop
A good purchase decision also needs an operating workflow. Without one, the factory may blame the machine for problems caused by rushed setup, unstable fixtures or weak quality gates. Both dot peen and scribe routes should be purchased with an approved production sequence in mind.
- Prepare the approved part family, traceability content, fixture and work order before the part enters the station.
- Clean or inspect the mark zone so oil, burrs or scale do not distort the first sample.
- Seat the part in the correct fixture and confirm it cannot shift when the stylus contacts the surface.
- Run the approved recipe for that part family and inspect the first-off mark immediately for position, readability and surface effect.
- Continue production only when the mark shape matches the approved sample boundary for that part family.
- During the batch, monitor stylus wear, fixture drift, line quality, missing dots, uneven line depth, re-mark attempts and operator workarounds.
- At shift end, record the completed lot, clean the station, inspect wear items and stop the machine in a safe ready state for the next run.
This workflow matters because selection failures often appear as operating failures: the part rotates slightly, the fixture changeover is too slow, the code content changes without review, or the operator compensates beyond the approved boundary just to keep the line moving. Those are system risks, not just machine risks.
5. Quality Checks That Protect Real Traceability
A permanent mark is only useful if the inspection team can trust it after the part leaves the station. Buyers should therefore define the inspection rule as part of the machine comparison, not after installation. The best process on a sample coupon can still fail in production if the line lacks a clear check for location, readability and repeatability.
- Verify the exact mark location, not only whether a readable mark exists somewhere on the part.
- Confirm the full character string or code content after recipe changes and shift changes.
- Check readability after the downstream process that matters: coating, blasting, painting, handling or scanner verification.
- Require first-off inspection whenever the part family, fixture, stylus or operator changes.
- Keep approved comparison samples so later repeat orders can be checked against real evidence instead of memory.
For broader production comparisons, the related dot peen vs laser traceability guide can help teams decide whether a non-contact route belongs in the next evaluation round. But this selector should still decide the dot peen versus scribe question on its own mechanical merits.
6. Takt, Maintenance and Cost Inputs
Buyers should compare cost inputs rather than ask for a universal machine price. The real cost model includes the marking head, fixture complexity, air or drive requirements, wear parts, operator training, maintenance cadence, changeover time, rework risk and the labor cost of failed marks. Takt should be measured at the production-cell level, not as an isolated laboratory cycle number.
| Cost or takt input | What to review during comparison | Why it matters |
|---|---|---|
| Fixture complexity | How much support, clamping or changeover hardware is needed for the real part mix? | A simpler marking head can still become the expensive option if the fixture burden is high. |
| Wear and maintenance | How often do stylus parts, contact surfaces or alignment points need inspection or replacement? | Wear frequency directly affects uptime, spare-part planning and operator behavior. |
| Line takt | Measure total part handling, positioning, marking, inspection and unload time. | Buyers often lose time in fixturing and inspection, not in the short marking step itself. |
| Rework and scrap risk | How often does the process tempt operators to re-mark or adjust outside the approved window? | The wrong process can look productive until rework and rejected parts are counted honestly. |
| Operator environment | Compare noise, ergonomics, access, training burden and safe stop expectations. | A quieter or easier-to-manage process can create real production value even without headline speed advantages. |
7. Quick Selection Table for Industrial Buyers
| If your project looks like this | Selection direction | What to prove in the sample |
|---|---|---|
| Heavy industrial parts that need robust serial traceability and accept visible indentation | Bias toward dot peen first | Depth consistency, readability after handling and stability across mixed serial content |
| Parts that still need a mechanical permanent mark but prefer lower noise and a smoother line appearance | Bias toward scribe first | Line continuity, readability, acceptable surface effect and repeatability after fixture changes |
| Cosmetic or sensitive surfaces where visible indentation is tightly limited | Keep scribe in scope and compare with laser marking before approval | Surface condition after marking, readability and customer acceptance after downstream finishing |
| Mixed part families where the plant needs broad serial-content flexibility | Bias toward the route that keeps setup simple and inspection reliable | Changeover time, recipe control and first-off quality after part family switches |
8. Safe Shutdown and Escalation Rules
Selection should also include the stop conditions. The operator should pause and escalate when the mark shifts outside the approved zone, when depth or line quality drifts, when scanner acceptance drops, when the fixture loosens, or when the team must compensate beyond the approved sample boundary just to keep the line moving. A safe stop protects traceability and prevents scrap from turning into hidden downstream cost.
- Stop when the mark shape changes from the approved sample, even if the code is still partly readable.
- Stop when the fixture no longer repeats the same part position.
- Stop when wear items or air or drive stability cause inconsistent marks.
- Stop when a new part family enters the station without an approved first-off sample.
- Restart only after the line records the cause, verifies the correction and passes a new first-off check.
Request the Right Recommendation
If you are comparing dot peen vs scribe marking for metal parts, send the part photos, substrate, mark location, code format, required permanence, downstream finishing steps, expected takt and inspection method. That lets CNMarking recommend the right permanent-mark route around the real material, fixture, maintenance and uptime constraints instead of forcing a generic answer.
For teams mapping a wider equipment roadmap, keep these supporting references together during review: the core dot peen and scribe machine page, the dot peen depth requirements guide, the nameplate marking comparison, the VIN marking selector and the engine code marking workflow.
Frequently Asked Buyer Questions
Is dot peen always better than scribe when the buyer needs a permanent mark?
No. Dot peen is often preferred when deeper mechanical indentation and flexible serial content matter most, but scribe can be the better route when quieter operation, continuous lines and lower visible surface impact are more important. The correct answer depends on the part family, durability target, code format and inspection rule.
Can one force, pressure or speed setting define the comparison for every metal part?
No. Buyers should compare the approved sample boundary on the real material, thickness, hardness and fixture condition. Universal force, pressure or takt claims are not reliable selection evidence.
What should a buyer inspect before approving either process for production?
Inspect code position, readability, character consistency, deformation around the mark zone, scanner or visual acceptance if required, and repeatability after fixture changes or end-of-shift restart. A good sample must survive the real downstream handling path, not just the first bench test.
When should a buyer compare dot peen and scribe against laser marking as a third option?
Add laser marking to the comparison when the part cannot accept visible indentation, when a high-contrast non-contact mark is acceptable, or when the line requires a cleaner mark on selected metals. In that case the buyer should still compare permanence, heat sensitivity, scanner needs and the true production takt.