
How to Laser Mark Plastic Without Burning or Deformation
How to Laser Mark Plastic Without Burning or Deformation
Plastic laser marking does not require labels, inks or mechanical engraving to create clear and durable marks. However, compared to metals, plastic is more sensitive to heat. If the laser power is too high or the speed is too slow, it may cause the surface to melt, burn, change color or deform.
Therefore, the key is not just to reduce the laser power, but to control the overall heat input and select the appropriate laser type and parameters based on the plastic material.
The following steps can help you achieve clear and high-contrast marking effects while avoiding damage to the workpiece.
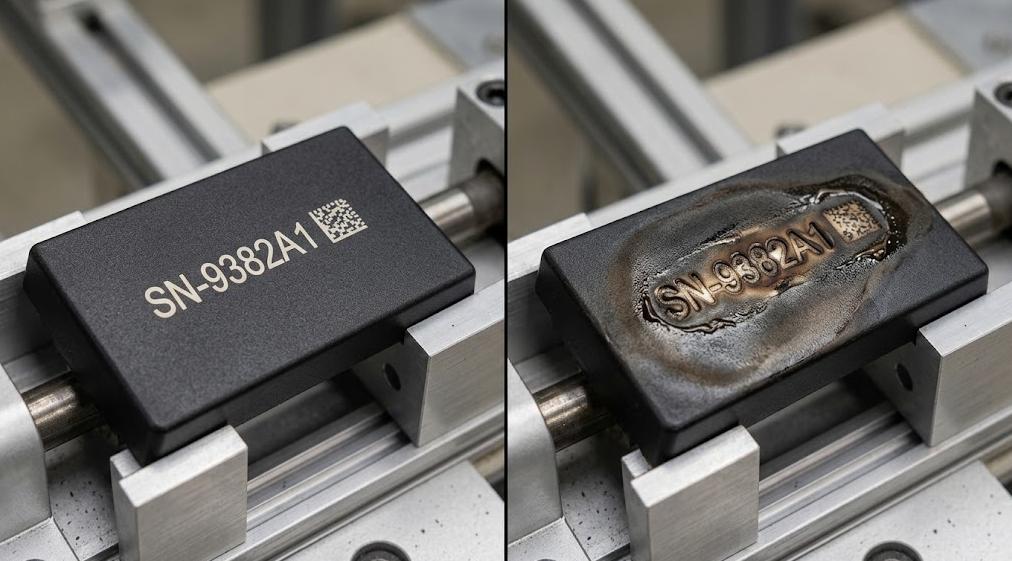
Why Does Plastic Burn or Deform During Laser Marking?
Most problems with plastic laser marking are related to excessive local heat concentration.
Common causes include:
- Excessive laser power
- Slow marking speed
- Inappropriate pulse frequency
- Mismatch between laser wavelength and plastic material
- Heat accumulation due to repeated marking
- Different laser responses of additives or fillers in the plastic
When the plastic absorbs too much laser energy, the surface temperature rises rapidly, and phenomena such as melting, bubbling, discoloration, warping or edge damage may occur.
When the marking color is not deep enough, directly increasing the laser power is a common practice, but this may also increase the risk of thermal damage.
A more reasonable approach is to control the heat input first, and then adjust the parameters to improve the marking contrast.
Choose the Right Laser for Your Plastic
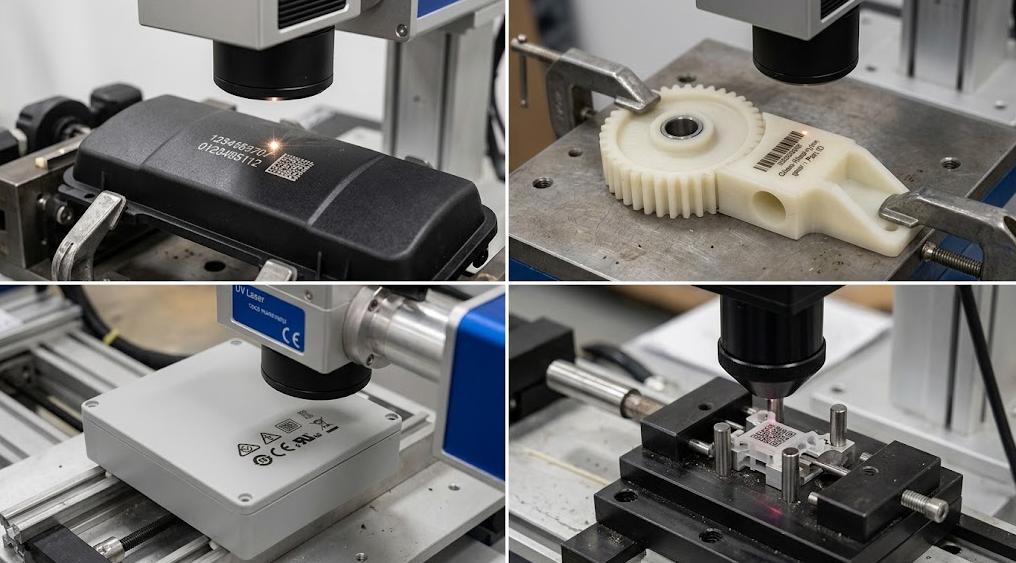
There is no single laser setting that works for every type of plastic. ABS, PA, PC, POM, PVC, and engineering plastics can respond very differently.
The right laser source for laser marking machine depends on the material, color, additives, required contrast, and application.
| Plastic / Application | Typical Laser Choice | Main Consideration |
| ABS | Fiber / UV | Control energy to avoid surface damage |
| PA / Nylon | Fiber / UV | Test parameters according to additives |
| PC | UV / Fiber | UV can help reduce thermal impact |
| POM | Fiber / UV | Requires controlled heat input |
| PVC | Depends on formulation | Check material composition first |
| Thin plastic parts | UV / Low-energy fiber | Minimize heat accumulation |
For instance, the way carbon-filled plastics absorb laser energy may differ from that of white or transparent plastics; and the processing characteristics of glass fiber reinforced engineering plastics also vary from those of unfilled materials.
For thin-walled, heat-sensitive or materials requiring fine processing, it is advisable to test ultraviolet (UV) lasers. Their shorter wavelengths act differently from the materials, and in some applications, they are more suitable for fine marking.
Before purchasing equipment, tests should be conducted based on the actual plastic formulation, rather than simply choosing a laser device based on the resin name.
Start With Low Heat: Adjust Power, Speed and Frequency
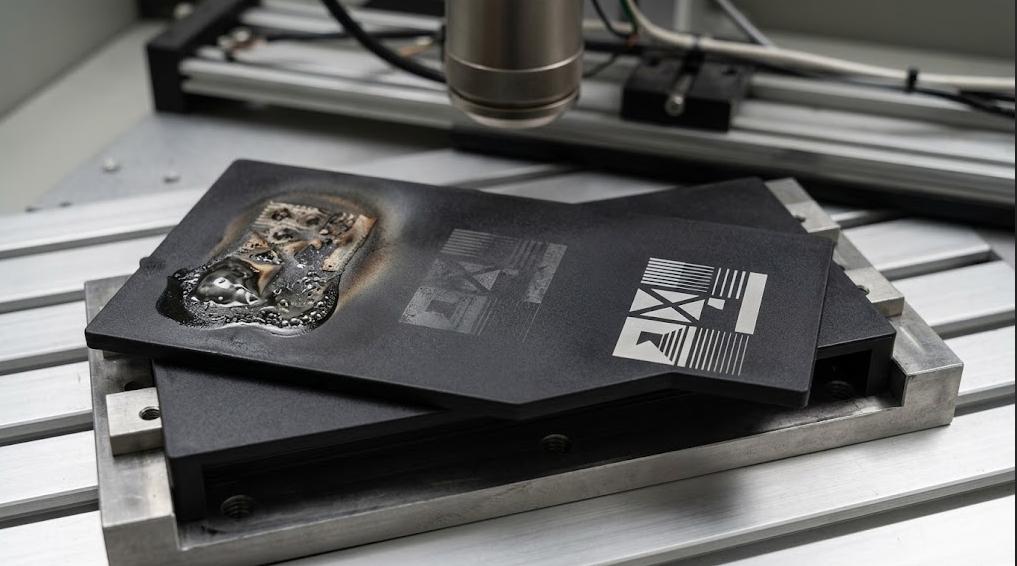
After selecting the appropriate laser, the next step is to adjust the marking parameters.
It is recommended to start with a lower energy level and gradually adjust based on the marking effect.
1. Reduce laser power: Start testing with a low power level to confirm whether sufficient marking contrast can be achieved without damaging the material surface.
2. Increase marking speed: If the speed is too slow, it will prolong the laser’s action time in the same area, resulting in heat accumulation. If there are phenomena such as melting or discoloration (yellowing or browning), increasing the speed is usually one of the priority parameters to adjust.
3. Adjust pulse frequency: The pulse frequency affects the way the laser energy acts on the material. The appropriate frequency depends on the plastic material and the type of laser, and it should be determined through multiple parameter tests. It is not advisable to directly apply metal marking parameters.
4. Use a small parameter matrix
You can quickly compare several combinations:
| Test | Power | Speed |
| A | Low | High |
| B | Medium | High |
| C | Low | Medium |
| D | Medium | Medium |
Compare the results based on contrast, edge quality, surface damage, and deformation.
The goal is not to produce the darkest possible mark.
How to Get High Contrast Without Burning the Surface
One of the difficulties in plastic laser marking is achieving a balance between marking contrast and surface quality.
If the marking becomes too shallow after reducing the power, it is not recommended to directly increase the power. Instead, you can first adjust the marking speed and pulse frequency, and conduct multiple low-energy scans on the plastic material for testing to replace a single high-energy scan.
For filling or large-area marking, the filling (hatch) parameters should also be adjusted. If the filling lines are too dense, it will increase local heat and may cause surface deformation.
If standard fiber lasers are difficult to meet the requirements, other laser types can be considered. MOPA fiber lasers have more flexible pulse control and are more advantageous in some plastic marking applications.
For heat-sensitive materials, electronic components, precision parts, and applications with low requirements for surface damage, UV lasers are also an option.
The final choice should be determined based on the material and marking requirements. Actual sample testing remains an important step in equipment selection.
A Quick Troubleshooting Guide for Plastic Laser Marking
If the plastic components show melting, burning or inconsistent marking, it is recommended to first adjust the laser parameters and then consider replacing the equipment.
- Melting or deformation: Reduce the laser power and increase the marking speed to reduce heat accumulation.
- Edges turning brown or black: This indicates excessive heat input. You can increase the speed, reduce the power, or decrease the number of scans.
- Marking color too light: Gradually increase the power or appropriately reduce the speed to avoid a significant increase in power at once.
- Insufficient contrast: Test different combinations of power, speed and frequency. If the effect is still not satisfactory, evaluate whether UV or MOPA laser is more suitable.
- Uneven marking: Check the focal length, workpiece position and surface condition.
For difficult-to-machine plastics, directly use the actual material for testing. The ideal parameters should achieve clear and stable marking while reducing thermal damage.
Summary
When performing plastic laser marking, it is essential to avoid burning and deformation. The key lies in controlling the heat input and selecting the appropriate laser source. It is recommended to start with low energy and gradually adjust the power, speed and frequency. Before moving to formal production, it is advisable to conduct tests using actual materials. If the fiber laser cannot achieve the required contrast without damaging the surface, UV or MOPA laser technologies can be considered.
Not sure which laser marking solution is suitable for your plastic components? Please feel free to contact Zixu for sample testing to determine the marking solution that meets your application requirements.